I’d like to install Ethereum from source, because it’s more easy and I can get the latest version.
According to the README.md, you may need to install Go (version 1.14 or later) and a C compiler first.
1
2
3
git clone https://github.com/ethereum/go-ethereum.git
cd go-ethereum
make geth
The output will be in go-ethereum/build/bin/ by default.
If you want to install in a different way, please refer to this.
Build Private Chain by Geth
We can modify the configuration of our own chain so that it will be more easy for us to debug the smart contract deployed and to trace each transaction.
We need to create a new directory to be the main workspace, and we need to create genesis.json in this directory before building the first block.
genesis.json
1
2
3
4
5
6
7
8
9
10
11
12
13
14
15
16
17
18
19
{
    //
    "config": {
        "chainId": 15,
        "homesteadBlock": 0,
        "eip150Block": 0,
        "eip155Block": 0,
        "eip158Block": 0
    },
    "coinbase" : "0x0000000000000000000000000000000000000000", // The address of the account that gets the reward by default
    "difficulty" : "0x1", // Difficulty of mining
    "extraData" : "",
    "gasLimit" : "0xffffffff",
    "nonce" : "0x0000000000000042", // Random number
    "mixhash" : "0x0000000000000000000000000000000000000000000000000000000000000000", // Related to PoW
    "parentHash" : "0x0000000000000000000000000000000000000000000000000000000000000000", // The parent node hash value. For the first block, it should be 0
    "timestamp" : "0x00", // UTC timestamp
    "alloc": { } // When the blockchain is generated, these accounts are given certain assets in advance
}
Run the command below to initialize.
1
geth --datadir "./" init genesis.json
How to Play with it
First we should notice that if we run the command like:
There will be error when we trying to unlock an account:
This is because in the new version of geth, to keep secure, the HTTP channel unlocking account is disabled by default. We can refer this issue from github.
If we just want to debug on our private chain, this may work (simply adding --allow-insecure-unlock):
Let’s presume that 0x5d31e74f0e52fe3fd58bd8079f84bc601a3f6d89 has some ethereum, so if he want to send his ethereum to another account, we should unlock first.
Sometimes we need to deploy a smart contract on our own chain in order to debug, and we need to check a certain transaction detail after the transacton is done. It’s convenient for us to use the APIs from web3py to do them all.
Installing web3py:
1
sudo pip3 install web3
In the entire Ethereum network, the service we start through geth can be called a node, and rpc (which we have already included in the starting command) protocol can be used to send RPC operations to the node, and to receive data from the nodes. Using web3, it can be simply like this:
In this case only, we use http://127.0.0.1:7050 to connect to our node (just as the parameters --rpc --rpcaddr 127.0.0.1 --rpcport 7050 stated). And if the output is true, we have successfully connected to our node.
There are more RPC methods to connect, according to the circumstances, you can choose one the most suitable for yourself:
IPCProvider
HTTPProvider
Auto check
…
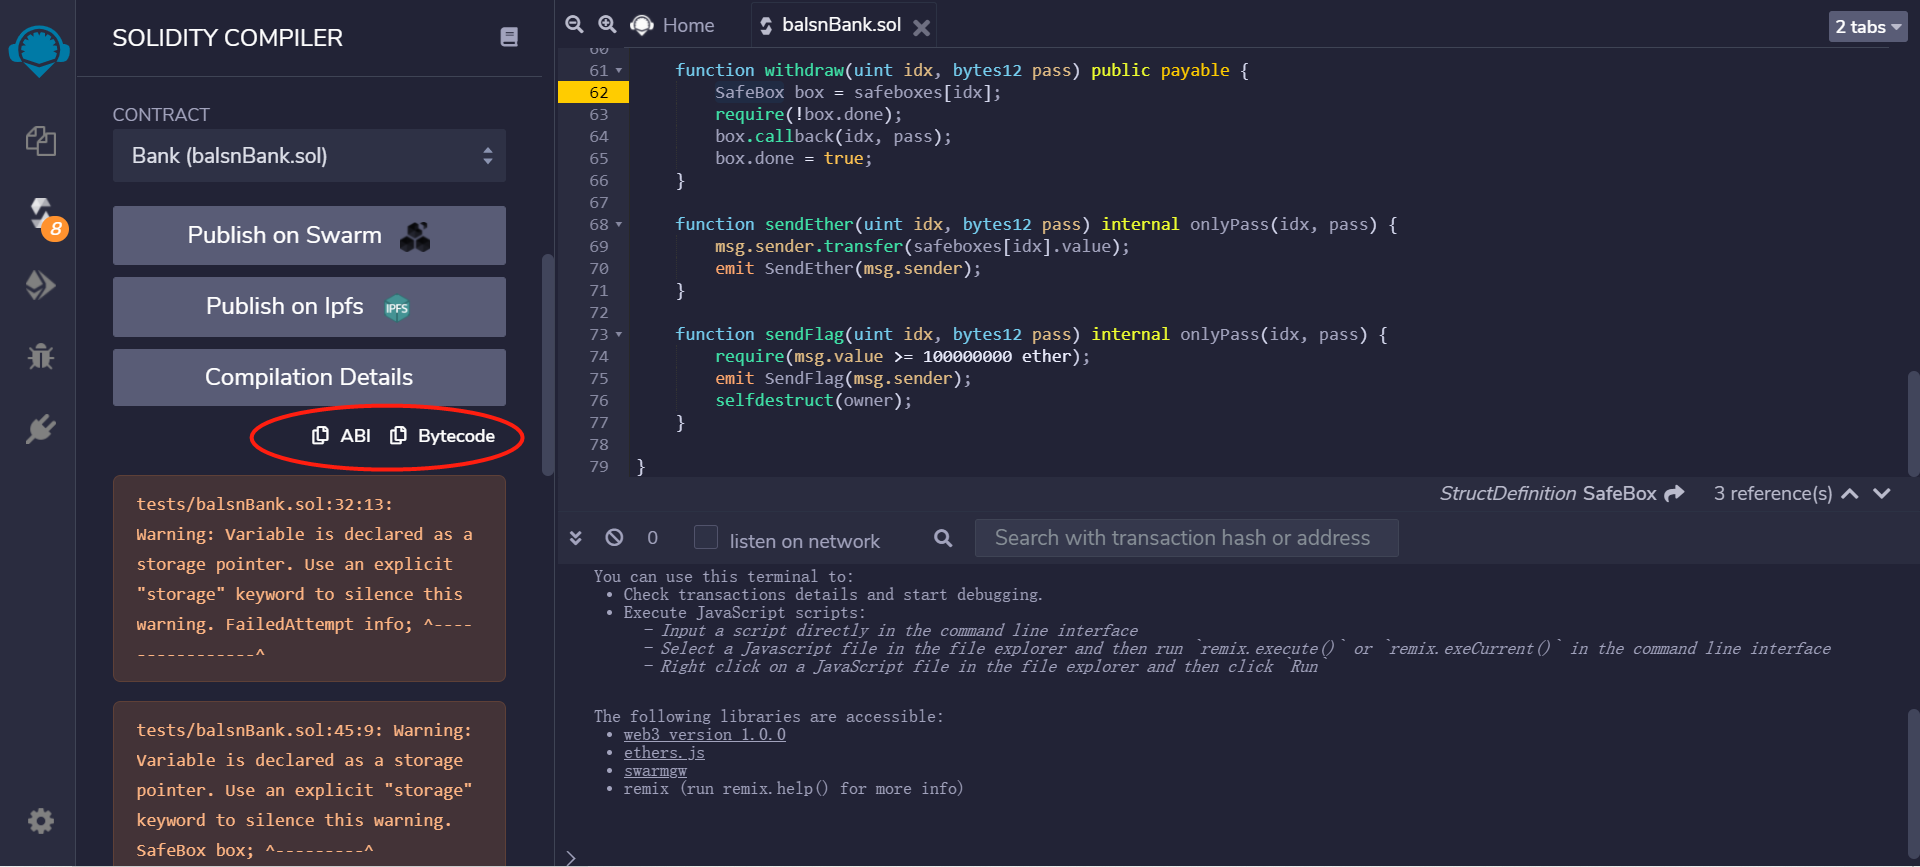
And how can we deploy the contract on the node? Some APIs from web3py also work. First you need to compile your contract on Remix to get its bytecode and ABI. Using command solc in console to get them is also OK.
For instance, If we want to call a function from a contract, the python code should be like this (The solidity source code is from BalsnCTF 2019 Bank):
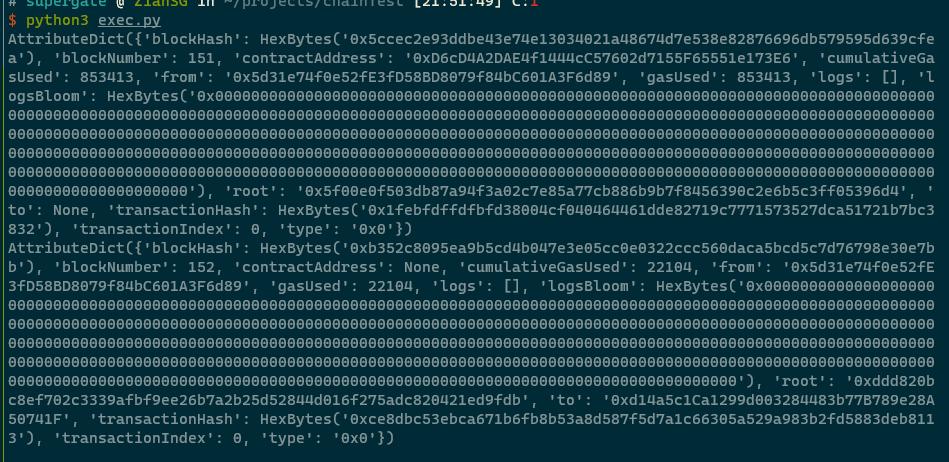
w3.geth.personal.unlockAccount(w3.eth.accounts[0], 'aaa') BalsnCTFContract = w3.eth.contract(abi=_abi, bytecode=_bytecode) txHash = BalsnCTFContract.constructor().transact({'from': w3.eth.accounts[0], 'gas': 1000000}) # The 'from' key states the manager of the contract. txReceipt = w3.eth.waitForTransactionReceipt(txHash) print(txReceipt)
bc = w3.eth.contract(address=txReceipt.contractAddress, abi=_abi) txHash = bc.functions.deposit(b'thisisahash').transact({'from': w3.eth.accounts[0], 'to':w3.eth.accounts[1], 'gas': 10000000, 'value': w3.toWei(97, 'ether')}) # There cannot be too much ether for the transaction, otherwise an error will be reported. txReceipt = w3.eth.waitForTransactionReceipt(txHash) print(txReceipt)
However if we try to run it, the program seems to be suspended. Remember what we talk about in the previous chapter? Only if there is at least one node minning, the transaction would be handled. So all we need is just to mine one block like this:
We can see that after the execution of BalsnCTFContract.constructor(), a contractAddress will be returned for users to locate the contract, and further more, we can use the address to call a function from the contract without deploying the contract again.